Pink !

Pink

Oh boy … I know, it’s very pink. But what can you do?

Here’s another “SOOC” shot. Yes, really. The strong distortions are created by more of a toy than a lens — a “Lensbaby” (in my case the Composer). It’s a fun lens with an intentionally “bad” optical design (only a small area is sharp, the rest is blurred) combined with a ball and socket design which allows you to move that “sweet spot” around in the image and place it where you want. It’s quite difficult you handly though, and the fact that it’s a manual focus lens doesn’t help.

Yet, it’s fun, fun, fun!

This images was shot back in January; I place the little missis right next to our large balcony window which gives this lovely, flattering soft light.

And just for the record: All of the pink coloured items in the image were given to us. While it’s a tad “kitsch”, we’re still very grateful for the gifts and donations!
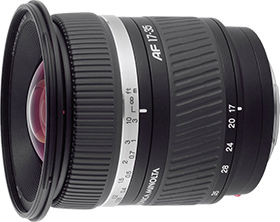
Minolta 17-35mm F2.8-4 Adobe Lens Profile

Next up in my series of Adobe Camera Raw Lens Profiles is a lens that many people use, but no-one seems to have gone through the rather laborious process of creating a profile for it.

Well, here it is. This one’s for the Minolta AF 17-35mm F2.8-4 D wide angle lens, profiled on a Sony Alpha 900 (DSLR-A900) body. However, this profile should also work well for its Tamron incarnation (with the long name “Tamron SP AF17-35/2.8-4 Di LD Aspherical (IF)” or just “A05S”) as well as when mounted on an Alpha 850 body.

I shot the following series: 3 Focal Lengths [17mm, 24mm, 35mm ] x 6 Apertures [2.8, 4.0, 5.6, 8.0, 11.0, 16.0] x 2 Focus distances [≈0.4m, ≈2.5m], resulting in a total of over 360 pictures used in the calibration process, the shooting of which alone took over 4 hours… The ZIP file again contains several files — one that contains all the sub profiles in one file, as well as two separate files for “close” and “far” focus (since you can’t select sub profiles in LightRoom at the time of writing).

But wait, there’s more. As a goodie I’m also throwing in my DNG colour profile for this lens (again, mounted to an A900), measured both for tungsten and day light (using a MacBeth ColorChecker and Adobe’s DNG profile editor) which should give you much more accurate colours than using the default profiles supplied by Adobe.

Download Minolta 17-35mm F/2.8-4 profiles

As you may know, creating such profiles takes a considerable amount of time and large prints of the calibration charts as well as a colour checker. If you find these profiles useful, please consider a small donation (conveniently via PayPal):

Thank you!

SOOC

Maynoofrica, Maynooth, Ireland, 2010

Here’s a new “category” of posts I want to start: SOOC. This funny acronym stands for “straight out of camera” and means just this — unedited pictures as created by the camera.

While you can do alot in-camera when it comes to colours, contrast, etc., you have to nail the framing when you take the picture as you’re not allowed to touch it once it’s on the memory card… [And you should clean your sensor, see the top left corner of this picture ;-)]

In order to get this picture, I used the “sunset” mode on my camera (yours should have this too) which renders said lighting situations in a particularly nice way with warm colours and strong contrasts (but I also dialed in a -1EV exposure compensation to get even more detail and saturation in the sky). I can’t emphasise enough the importance of knowing the “scene modes”, “creative styles”, or whatever it is called on your camera. Know which ones you have, what they do exactly (either the manual or some in-camera help will tell you) and make sure use them in the appropriate situations!

One could be tempted to think this shot was taken somewhere special (like Africa), but no, it’s just good old Maynooth. This is what we get to see every day whenever the weather permits it.

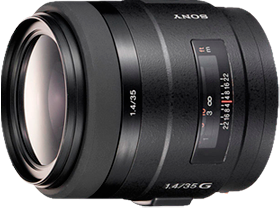
Sony 35mm F1.4 G Adobe Lens Profile

Here's another new series of posts. I'll be posting Adobe Camera Raw Lens Profiles that I've created. If you don't know what this is, don't worry ;-)

The first one is the Sony AF 35mm F1.4 G (or SAL-35F14G) profiled on a Sony Alpha 900 (DSLR-A900) body. However, this profile should also work well for the two previous Minolta versions of the lens as well as when mounted on an Alpha 850 body.

I shot the following series: 7 Apertures [1.4, 2.0, 2.8, 4.0, 5.6, 8.0, 11.0] x 3 Focus distances [0.35m, 1m, 1.7m], resulting in a total of 126 pictures. The ZIP file contains several files. One that contains all the sub profiles in one file, as well as separate files for the different focus distances (since you can't select sub profiles in LightRoom at the time of writing). Update: The file now also contains a DNG color profile for the lens!

Download SAL-35F14G profiles.

As you may know, creating such profiles takes a considerable amount of time and large prints of the calibration charts. If you find this profile useful, please consider a small donation (conveniently via PayPal):

Thank you!

Light & Shadow (again)

Light and Shadow, Maynooth, Ireland, 2010

Phew, long time no post. That’s mainly due to all my panoramic activities of late… But well.

Here’s a quick snap I took this lunch time, just walking home to cook dinner. This was shot again with my cellphone, and post-processed a little in-phone as well (using the rather handy “Photogrene” App).

All I did was adjust the levels (increasing the black clipping point) in order to boost contrast, raise the colour temperature a little (the picture felt rather “cold” with what the phone’s automatic white balance had chosen) and add the almost obligatory vignette.

The reason I took this pictures is obvious — a beautiful mixture of lights and darks as the (rare) sun light was filtering through the trees above. I tried to be as symmetric as possible with the composition as not to distract from but rather support the main subject of the image: the ligth patches. I framed the two bigger blobs at the lower end of the frame as to give a starting point to the eye. It’s typically drawn to them, but then wanders off down the path…

Panoramics


facebook_thumb

=> St. Mary Square in Ireland

Here’s another première — and the reason why it’s been so quiet here, lately: Panoramics. Having played around with panoramic photography for quite a while I never got it quite right.

I mean, I’ve had a panoramic tripod head for a good while now, but using it together with a wide angle lens resulted in a rather involved, lengthy process to put the final panoramic image together (it took me several days for just one panorama). Plus you don’t always want to be lugging all this gear around…

Anyway, what changed all this was this article which presents a technique that only requires 4 pictures to be taken (with a fisheye lens) to get a decent 360°x180° view of basically everything. Together with the insane 25 megapixel resolution of my camera and some suitable software (which just does work significantly better, more reliable and faster than the free Hugin) I can get a 8200×4100 pixel panorama without a tripod and in no time at all!

So I’ve spent the past two weeks dipping my toes in panoramic waters, and I’ve created quite a few lately. Watch this space as I post more images and talk a bit more about the actual technique (in case you’re interested). Ultimately, of course, I’d like to monetise my growing experience in the area, just like with my regular photography.

Snooker

Down in the snooker hall, Maynooth, 2010

A small permière — here’s my first “analog” image on this blog. Yes, “analog” as in taken with an old analog camera on black & white film (Ilford XP2 Super). Nothing too special, just a nice, moody photo I took down in the snooker hall of the college.

I recently started taking film photos again for a number of reasons. First of all, it’s kind of cool. Second, pressing the shutter button costs me roughly 50c each time, so even though these are not huge sums (compared to medium format or even large format photography) you don’t just go simply snapping away like you were using a digital camera. No, you end up slowing down a lot. Double and triple checking everything, composition, camera settings — especially shutter speed as there’s no “sensor based” image stabilisation on film, so I have to be very conscious of the 1-over-focal-length rule, see here for example — and if the person I’m about to shoot is about to blink her eyes. Third — not that I think my photography will be any more relevant in 50 years than it is now — people will always be able to do something with a film negative, but not necessarily with a file in an ancient film format, if it survives that long anyway and doesn’t get lost in a hard drive crash.

At the moment I’m just getting the film devoloped down at the chemist (3 EUR for a roll of 36), then “scan” the images using my digital camera on a self-built light table, together with a macro lens and flash gun from below. Forgive me, but I’m really proud of the set-up — you can see the proof of concept set-up here, and the current version here. Obviously a flim scanner would be better at handeling dust and other types of airborn dirt, but none of the affordable ones give you 25 Megapixel scans ;-)

Blue Moon

Blue moon, Maynooth, Ireland, 2010

I can’t help taking photos from our balcony. There’re just too many interesting scenes your get throughout the day and the night.

This one here was taken one foggy evening with the moon up in the sky. Unfortunately, the moon always feels larger in real life than it turns out on your photos. Unless you use a really long focal length, it just ends up really small :(

But I still liked the colour contrast (again) between the orange glow from the street lams and the blue-ish moon. Also — it’s kind of hard to see on this picutre — but the layer of fog that night wasn’t very high and the moon was just above it, in the clear. Not the greates picture, but I still wanted to share it :-)

Almost night shots

Brandenburg Gate, Berlin, 2007

There are several interesting times througout the day to take photos. For instance, I recently talked about the Golden Hour. Today, I’d like to talk about the last moments of the dusk.

Famous buildings and structures are typically lit with Sodium vapour or Halogen lamps which produce an orangy / yellowy type of light. Now what’s the complementary colour of that? You’re right, it’s blue. What do we know about warm and cold colours? Warm colours stand out, make the object appear closer, more present, wherease cold colours create distance and separation. Now that’s a wonderful contrast, isn’t it?

So next time you want to take a night shot of something, try not to take it when it’s already completely dark, but a bit earlier, towards the end of dusk. That way, you can achieve a lovely deep, dark blue in the sky (weather permitting…) which can give you beautiful night shots with a not-so-boring skye.

Always at the ready

Fog late at night, Maynooth, Ireland, 2010

Hands down, the best camera is the one you’ve got in your pocket, always at the ready. I must have said that before somewhere, but there’s no better camera than the one you happen to have with you when you need it.

The photo here was taken late at night when I was returning from Dublin. A seriously creepy fog hung over the by-then quiet village (ok, town…) and produced this surreal but chilly atmosphere. I so wished I’d have had my film camera with me, or my digital SLR, but I didn’t. So I tried to take a photo with the camera on my phone… Better than nothing, I thought.

As it was rather dark, the camera basically just said “That’s it, I’m out of here”. Unfortunately, the company with a vegetable in its logo doesn’t let you configure or manipulate in terms of camera settings, exposure or whatnot — you’re stuck in fully automatic mode. On top of that, it appears that the software just won’t use shutter speeds of longer than a 1/10 of a second, and the ISO maxes out at 1000. That meant that the overall picture was quite dark, and I had to push the brightness a lot in post-processing. That, in turn, brought out loads of noise, but hey, that’s fine — just do convert the image to black & white trick and the noise can work for you.

So that’s the picture I made out of it, as I said brightening the original image somewhat, and adjusting the black level up somewhat as to maintain the “low-key” spirit of the picture. Quite a contrast to the previous post, I guess.