High key

Magdalena at her wedding, Ojerzyce, Poland, 2008

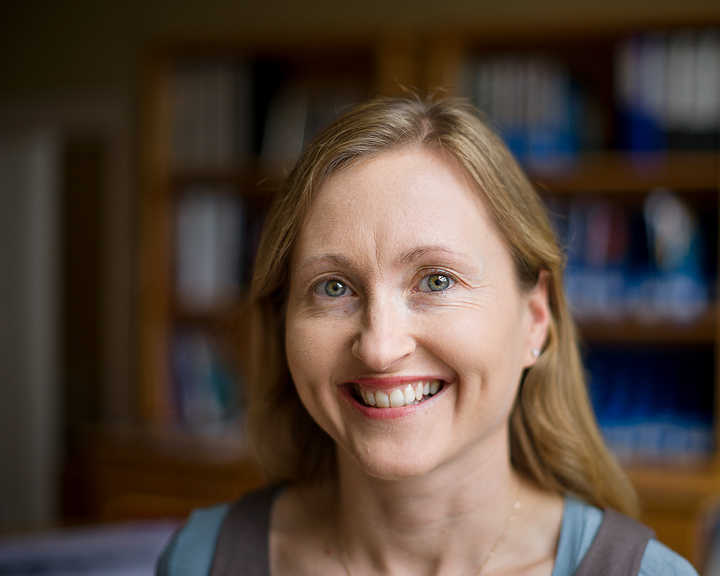
Reminiscent of the Sugar loaf picture from a while back, here’s another high-key type of photo. Now when you shoot weddings with brides in white dresses and kids playing around, high-key may feel cheesy and cliché, but every now and then you may get some real gems. High-key in photography usually refers to subjects and scenes that you intentionally overexpose slightly; oftentimes the motives themselves would have light tones to start off with.

Now there’s two ways of getting high-key images. Either you really overexpose the picture when you take it, or you push the brightness afterwards in post-processing (like this one here, which has been brightened by almost 2 EV). For the latter, however, you really want to have been shooting in RAW, otherwise there’s just not enough information in the dark tones to work with…

Finally you also want to play around with the saturation. The Sugar Loaf photo, for instance, was highly saturated, whereas the one here is a bit more muted. If you really want to go over the top, experiment with a white vignette.

Daisy

Cylcone “Daisy's” effect on Maynooth, Ireland, 2010

While cyclone “Daisy” has large parts of Europe in its icy grip, Ireland is going “tits up” (as a dear friend from Manchester would phrase it) with even the University postponing exams (can you believe it!!), myself and many other people thought — hey, this is a great photo opportunity. Let’s take some photos while it lasts.

So hoping to make the 2010 NUIM Christmas Card again I grabbed everything I needed and went for a little photo tour of the South Campus.

I’ve talked about snow photos before, so not too much to added apart from don’t forget the exposure compensation (I’ve seen plenty of muddy grey snow pictures floating around in Facebook again) and if you want to be fancy — use a polarising filter to blue-e-fy those skies. Or imitate the effect it in post-processing if you can’t / don’t want to use one. Do that in your favourite photo editing application by darkening, selectively, the blue channel.

Of eyes and windows

Sophie's Eyes (age 2 months), Maynooth, Ireland, 2009

Here’s another shot of my favourite daughter, taken at the end of last year. Her eye colour, which started off as very undefined, dark grey, is now beautifully converging to an amazing blue. I wonder who she got the genes from for that…

In terms of photography, I photographed her sitting / laying in her favourite vibrating bouncer seat (looks something like this) next to the window, looking outside. This is one of the most classic locations and is pretty much the perfect place for portraiture. Classic, as it initially provided photographers with a strong enough light source for taking photos in the first place (way back in the day when the light sensitive materials were hardly light sensitive at all, by today’s standards). But even before, it has been widely used in painting for instance.

Positioning your subject next to a window (during the day…) provides you with nice soft-box like lighting (no harsh shadows). Also, natural light contains the full spectrum of visible light (as compared to various artificial light sources that just contain a limited and often times fragmented spectrum) — which will get you beautiful, natural colours if that’s what you want. Apart from that, if you position your subject carefully you might also get some nice catch lights in the eyes (that is the reflections you see on the eye and the iris).

You might want to use a reflector though on the other side of the face that’s away from the window so it doesn’t drown in darkness…

Here are two more portraits I took near windows, 1 and 2.

Another Sunset

Sunset at NUI Maynooth, Ireland, 2007

[irrelevant]I’ve spent some time over the Christmas holidays revamping this blog (mostly under the hood though). Just quickly: For a while now I’ve been using a wordpress plugin called Yet another photoblog together with some custom code to automatically generate in a non-messy way the EXIF table you see at the end of each post and to create the reflection below the images. Unfortunately I didn’t use this nice plug­in from the beginning, so there were about 30 picture posts left out. But since the plugin does a very elegant job of everything I’ve decided to migrate the old posts so that now every post goes through the plugin. This then allowed me to automatically generate a comprehensive list of all the pictures discussed so far, which you can find by clicking on any of the “More pictures” links. Also, the random pictures in the top right are now picked from all the images posted so far. Finally, thanks to the wonderful php-typography class the typography of the posts should be cleaner, and best of all: there’s now hyphenation — I never thought this would be possible with HTML, but there you have it![/irrelevant]

Today’s photo was shot way back in 2007, and shows one of the massive sunsets we get here in Maynooth in the winter months. Now when you shoot sunsets, as I said before, the most important thing is exposure and white balance. And composition.

Exposure
If you camera is set to automatic, it usually overexposes sunset scenes and you loose all the intense colours. So make sure you set your exposure compensation to some negative value (experiment around a bit, starting from, say, -1 EV).
White balance
You’re best off using the a scene mode (most cameras have a “sunset mode” of some sort) which should take care of that. If you have control over the white balance though, make sure your above at least 6000K with some extra magenta added in too.
Composition
It always helps if you have an extra subject apart from the sunset in the scene. You see, unfortunately there are way too many sunset (or sky pictures in general) around, so a picture of just a sunset is usually quite boring, no matter how impressive it is. Instead, try to include an extra subject in your picture, like the two guys here you walked past just at the right moment. That way, you generate an extra amount of distinction to all those sunset pictures out there…

On the phone

Lady on the phone, Dublin, Ireland, 2009

Here’s a somewhat “street photography” style shot. I took it about two months ago, when I was spending the better part of the day with Steffi and Sophie at Holles Street Maternity hospital in Dublin. One afternoon I went for a short walk to catch some fresh air, and thankfully took my camera with me. That’s when I spotted this lady sitting there, on the phone.

I politely asked her if it was ok to take a photo and she said “yeah, why not”. So I had a quick think about how I wanted to take the photo and how to best capture whatever it was that made me want to take the photo in the first place. My subsequent considerations included small aperture to get those sun “rays”; center weighted metering on the foreground as to expose for the lady, not the (much brighter) sky behind her; manual mode so not to take any chances with the camera’s own automatic metering; low camera position to get the shadow of the fence more prominent into the frame; one shot only as I didn’t want to bother her too much; etc.

So walking over to where I wanted to shot from I did a quick test shot from the hip to double check proper setting of the exposure (insecure me) and then kneeled down to take the actual picture. It was only then that her conversation had turned into shouting — and from what I could her she was just dumping her boy friend …

Bipolar

Wat Luang, Pakxé, Laos, 2008">Two street cats at <i>Wat Luang</i>, Pakxé, Laos, 2008

How many subjects can you have in a photo? Well, it depends on how you group them, I suppose. Here you could say: “The two cats are the subject”, or you could say: “The cats are the two subjects” …

Well, whichever way you look at it, placing two subjects diagonally opposite in a frame creates a good deal of confusion for your eyes — especially if the subjects look very similar. You will have a hard time settling for one of them, and thus move back and forth between the two points of attraction.

The cats above were two street cats just chilling out in the sunshine at Wat Luang, a Buddhist temple in Pakxé, Southern Laos.

Christmas Card

St. Patricks College on a winter day, Maynooth, Ireland, 2009

Who’d have thought it. Back in February this year I jumped at the opportunity to take a few pictures of the beautiful NUIM South Campus clad in white.

You see, it doesn’t snow a lot in Ireland, and the snow usually just stays for a couple of hours, so I had to move fast. I grabbed my camera, batteries, a bunch of lenses, gloves, and off I went to take some photos around the university.

And then, about a month ago, the university’s PR office asked me if I had any nice winter pictures of the university, for use on this year’s official NUIM Christmas Card. Well, out I pulled this one and guess what — it made it! You can buy the cards around campus now and see me walk around with a big smile :-)

LR2 vs. LR3b

Comparison of the noise handling in LightRoom 2 and LightRoom 3(beta).

Well FINALLY. Let me repeat this. Well FINALLY. Adobe got their heads out of their butts and FINALLY revised their RAW conversion engine from the ground up to FINALLY provide some decent raw conversion results, especially for images taken with Sony D-SLRs.

What’s a RAW? Just quickly, it’s basically just the very raw, unaltered data captured by the camera’s sensor, more or less directly dumped into a file with (hopefully) zero processing done in-camera. This means that it’s actually not an image, but really just pure data. Just numbers. These numbers need to be converted later, on the computer, into an actual image before you can actually see anything. Thus the quality of the final image depends to a large part on the software used (and less so — to some extend — on the camera and its processing capabilities).

Since I shoot 100% of my pictures in RAW, it is crucial for me to have a software that does a good job at converting them. Unfortunately, so far Adobe’s Camera Raw, which does this job in LightRoom (a beautiful piece of software in itself), has done it very badly for Sony RAW files (for a number of reason I won’t get into). In any case, this has radically changed with the LightRoom 3 (beta) that was released a couple of weeks back.

Here’s an excerpt of an image that I had to take at ISO 6400 to get short shutter speeds so I could capture the torrential rain. Left: LightRoom 2, Right: LightRoom 3 (beta). Check out the difference in how the colour noise is removed beautifully, to actually reveal that it was indeed raining quite heavily. Also, there’s generally much more detail in the image on the right. So I can’t wait for the full version to come out.

Autumn again

Autumn in Maynooth, Ireland, 2009

Ireland’s a generally rainy place, we all know this. But every now and then — even in autumn — you get a few hours of sunshine (if you’re lucky).

And so, yesterday, we went for a stroll (the three of us now) around Maynooth to profit from this short window of good weather (which, in the end, only lasted about 4 hours). Of course we went through the beautiful Sound Campus of the university, just because it’s so pretty in sunshine. This took us past this magnificent, incredibly strongly colour tree right outside St. Patrick’s House.

Seeing the blue sky, I also grabbed a polarising filter when we left, which then allowed me to really bring out those colours. They turned out so intense, that the picture as seen here in a browser (due to the relatively small gamut of the sRGB colour space) cannot render the actual saturation of the colours!

Pinhole experiments

Pinhole experiments, Maynooth, Ireland, 2009

Whoooh… this one’s to toying around and experimentation….

It’s been a while since I played around with the idea of building a pinhole camera. The cheapest way to do this (if you happen to have a D-SLR) is to just buy a cheapo body cap for the camera (that’s a plastic cap that you can cover the front of the camera with if you have no lens attached) and drill a hole into that.

Now with pinhole photography, you need a very small hole to make the whole thing work. And the best way of achieving this is to actually put a larger hole into the cap (say 3mm diameter), and then stick some aluminium foil over the hole. Then you pierce the actual, tiny hole with a needle into the tinfoil. The cleaner, rounder, perfect the hole, the better the sharper image you get out of it. I’ll post a photo of my camera with the modified cap later on.

The funny thing with pinhole photography is that you have super small apertures (in the hundreds or two-hundreds!), which means two things: 1) pretty much infinite depth-of-field, i.e. everything is in focus, from right in front of the camera all the way to infinity, 2) very long shutter times (because of the small aperture).

The photo above was just some toying around in the living room, firing my flashgun into my face in a few different spots while exposing for about 20 s. It’s quite blurry, but I’ll have a few more attempts at piercing a better hole (some people actually use lasers for that!).